OpenID Connect Authentication
Seq can authenticate users with an external OpenID Connect (OIDC) provider. Many identity providers support OpenID Connect as a standard authentication protocol layered over OAuth 2.0.
Before you begin...
Popular browsers, including Chrome, will no longer send cross-site authentication cookies unless the request is secure (HTTPS).
If you're running Seq on Windows, you'll need to configure Seq with an SSL certificate before setting up OIDC.
On Docker/Linux, you'll need to configure SSL termination at a load balancer/reverse proxy/ingress, and set the
SEQ_API_CANONICALURIenvironment variable in the container to Seq's public HTTPS address.
Configuring Seq with OpenID Connect authentication
This example uses Auth0 as the identity provider. Terminology and URLs will differ between providers. If you'd like information about configuring your specific provider, please let us know.
1. Register the Seq application in your provider
First, log into your OpenID Connect provider's admin interface. Choose to add an "application" or "client" to represent your Seq server.
If prompted for the application type, register Seq as a regular web application.
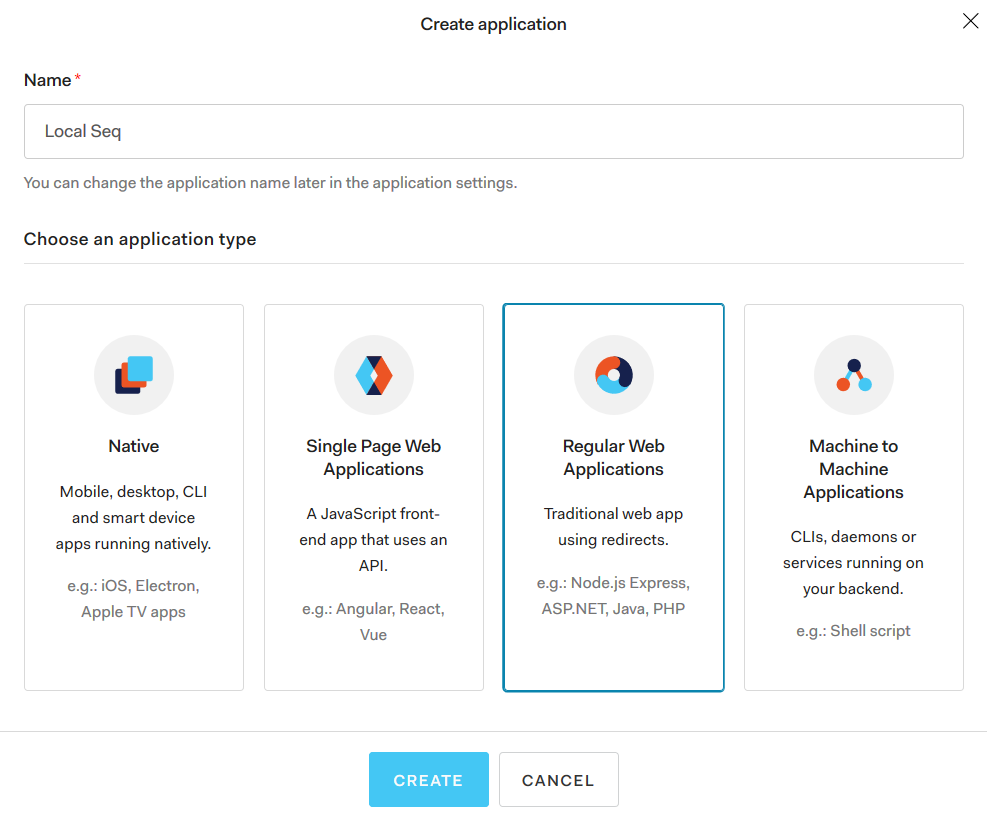
We're going to set up OIDC for a local, development instance of Seq running at http://localhost:5341, so we'll call it Local Seq, but you will normally name your application Seq if you have only one instance running.
2. Collect basic information from the provider
Your OIDC provider will supply some basic settings that let Seq connect and authenticate users.
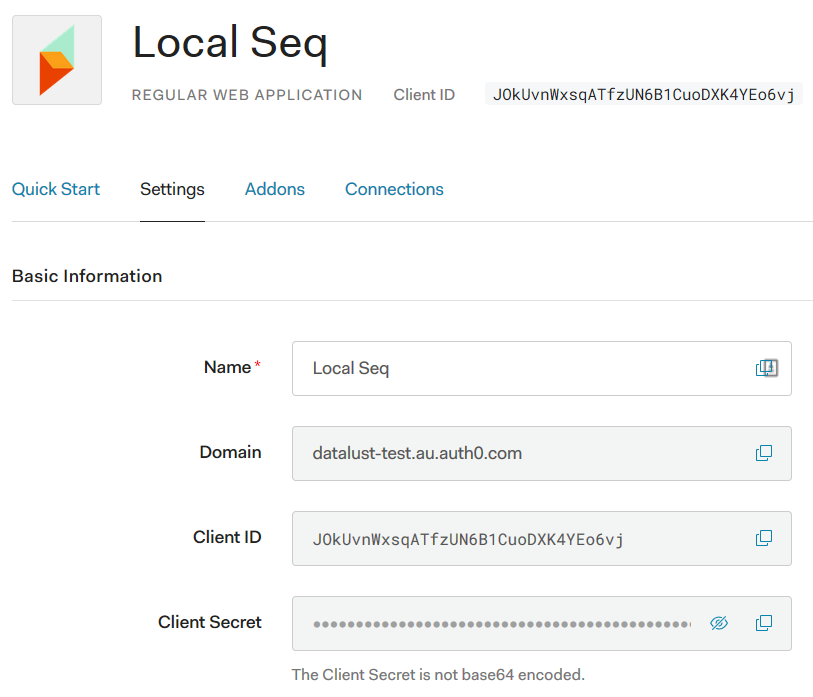
3. Configure Seq to use OpenID Connect authentication
Under Settings > System in your Seq server, find the Authentication heading and select Change....
In the drop-down list, choose OpenID Connect as the authentication provider. This will show inputs for the basic provider information seen above.
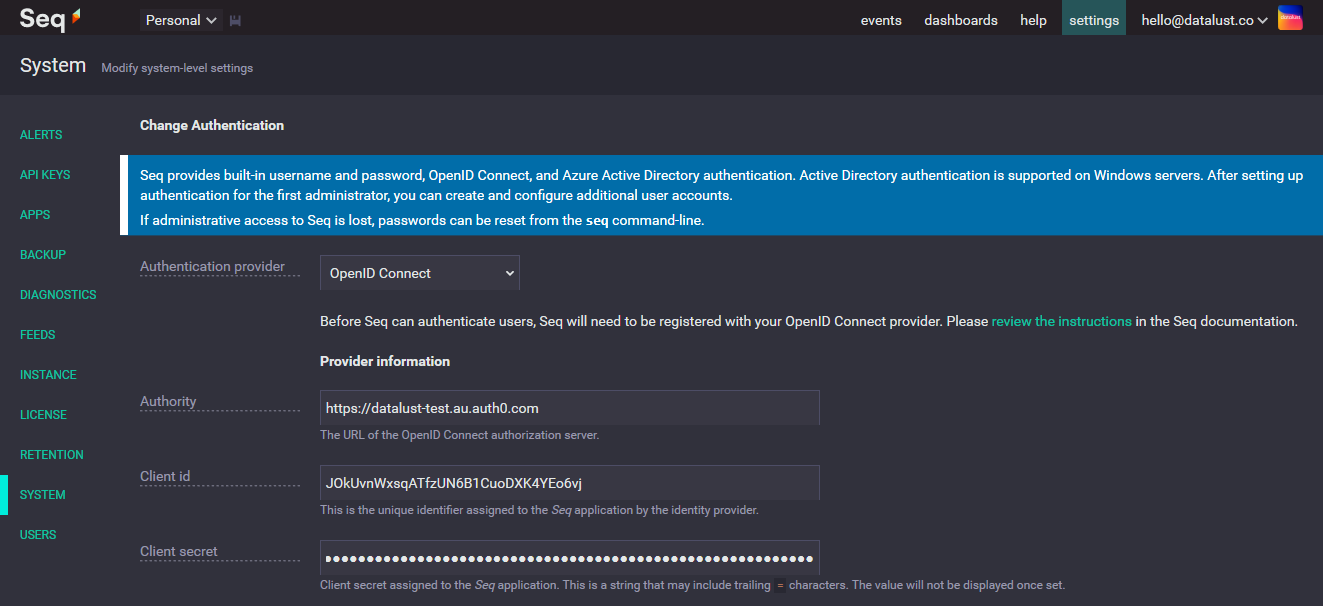
The three basic settings here are:
- Authority - this is the URL of the OpenID Connect provider; Auth0 calls this Domain, while other providers use different terms
- Client id - this is the unique identifier for the Seq application assigned by the OpenID Connect provider
- Client secret - this will also be assigned by the OpenID Connect provider
Slightly further down the page, you will find some additional settings:

- Scopes - Seq will request these scopes when authenticating users; currently, the three default scopes are all required, and this field should not need to be modified
- End-session redirect URL - this is a provider-specific URL that Seq will redirect users to when logging out, to complete the logout process in the OIDC provider; for Auth0, this is
/v2/logout?client_id={clientId}
End-session redirect URLs
The end-session redirect URL is important, because without it, users who log out can often be trivially logged back in as their OIDC provider session will remain active.
Unfortunately, acquiring this URL is not yet been standardized through OpenID Connect, so you'll need to consult your OIDC provider's documentation for the correct URL.
4. Copy the Seq callback URLs to the provider
We're not quite finished on the Seq side yet, but we'll need to switch away and copy some details back to the OIDC provider from Seq.
A little further down the page, you'll find two read-only settings displaying callback URLs exposed by your Seq instance:

These two settings need to be copied back to your OIDC provider, so that it can redirect users back to Seq on log-in and log-out.
Auth0 exposes these as Application URIs:
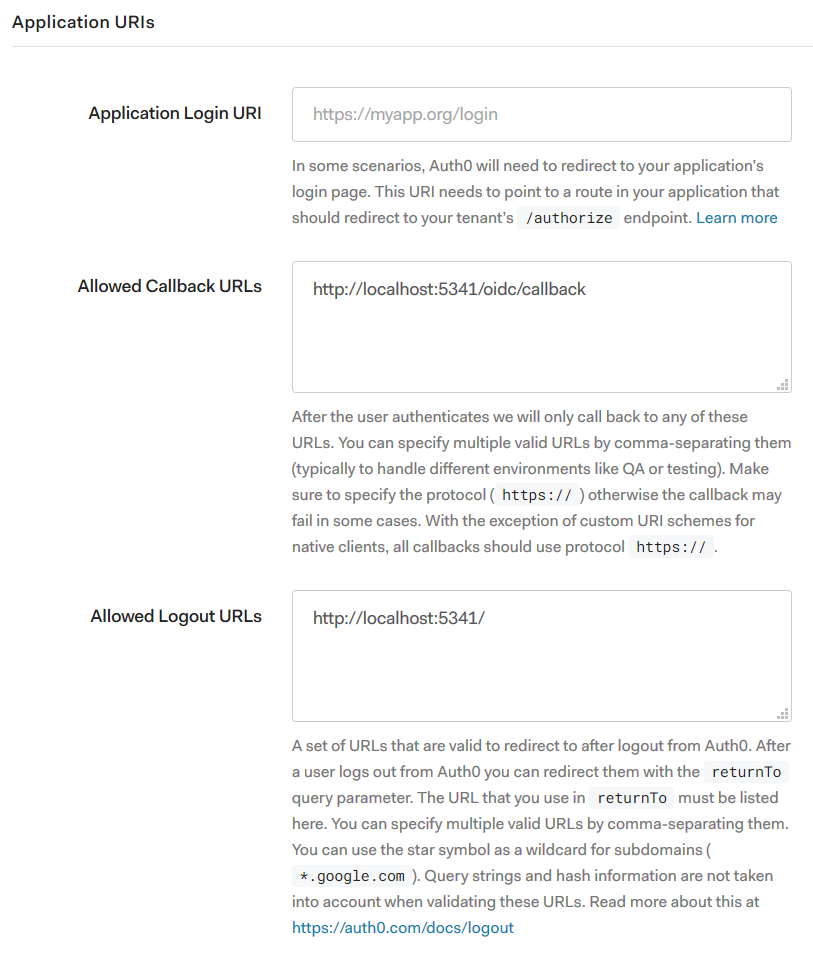
Save the settings for the Seq application in your OIDC provider now
We've finished setting up the Seq application at the OIDC provider, though we'll need to confirm some user details before finishing up on the Seq side.
5. Confirm administrator details
Whether you're setting up Seq for the first time, or moving from another authentication mechanism to OIDC, you'll need to make sure your account settings match what the OIDC provider will send.

In the Administrator section near the bottom of the page, use the email address associated with your identity in the OIDC provider as your username.
How Seq matches accounts with OIDC identities
When an account is created in Seq, it won't be linked directly to the OIDC provider's notion of a user identity.
Instead, when the user first logs in, Seq will look for an unlinked user account with username equal to the verified
Once the user account has been found, Seq will record the OIDC provider's unique identifier for the user (the
nameidentifierclaim) in the user account, and this will then be used to link the user account and identity for future log-ins.
You can optionally specify the same (or a different) email address in the Email field, but this is only used for displaying your user avatar.
6. Enable OIDC authentication in Seq
Click Enable to complete setting up OIDC authentication. This will log you out of Seq and present a login screen like the one below:
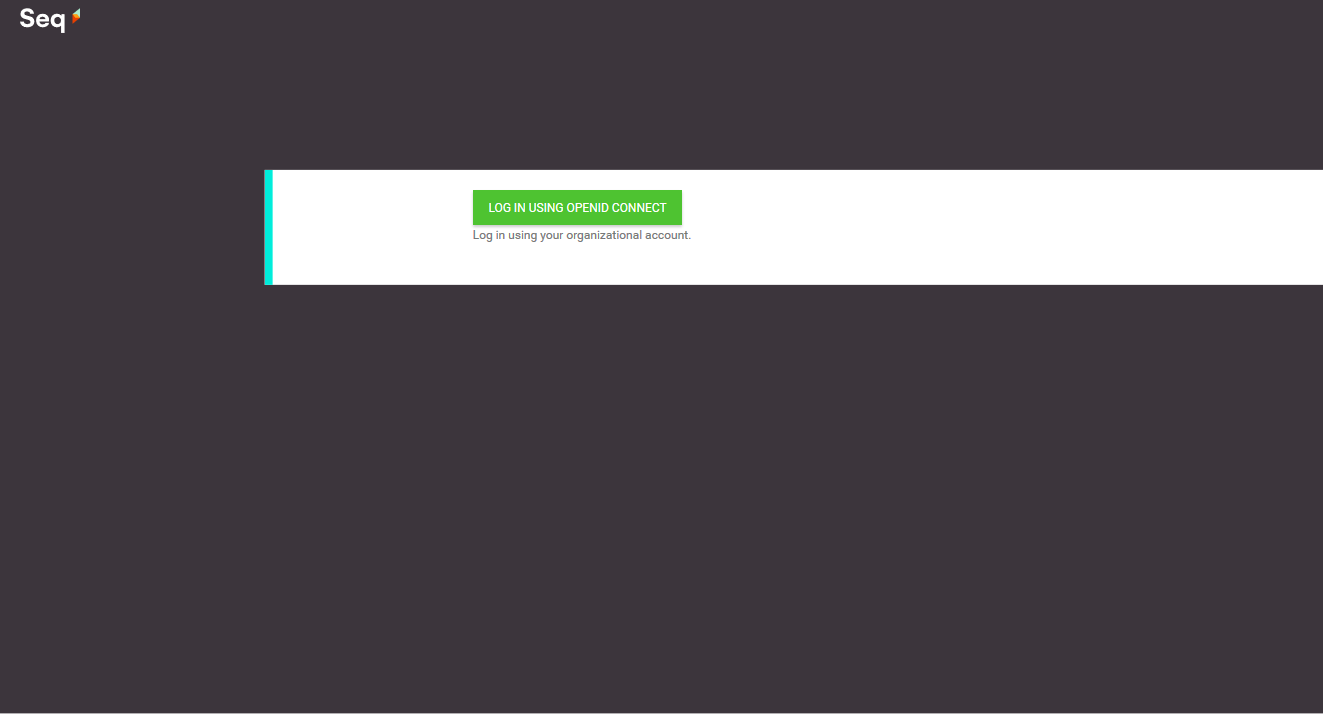
Click Log in using OpenID Connect. You'll be redirected to your identity provider and after successfully authenticating, there, will be returned to the Seq events screen.
Don't panic!
If authentication fails, and you find yourself locked out of Seq, don't panic! At the command-line on the Seq server (or host if you're running Seq with Docker), you can revert to username/password authentication using:
seq stop
seq auth --basic -u <username> -p <password>
seq start
where
usernameis your admin username, e.g.[email protected], and the password is a new password of your choosing.If you're still stuck, please get in touch with Seq Support.
Migrating existing users to OIDC identities
If your Seq server is already configured with a different authentication provider, you can still follow the steps above to enable OIDC.
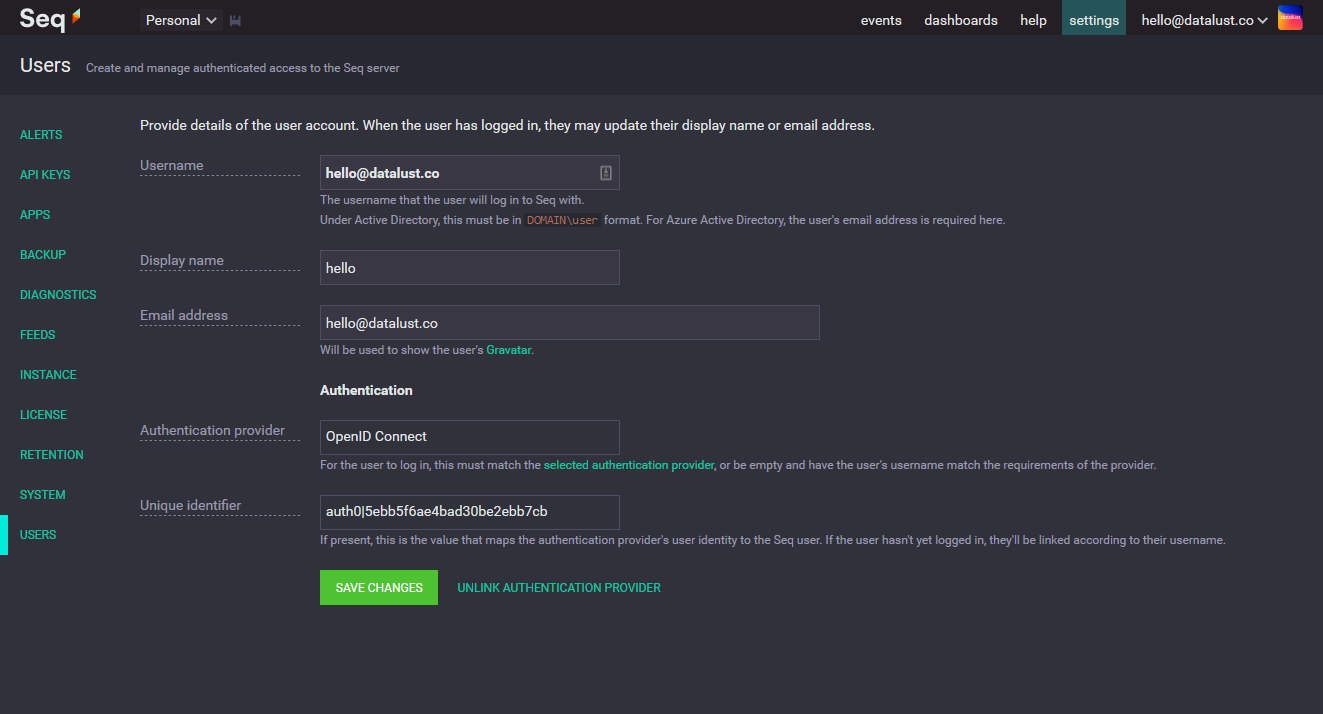
To link existing users (after the first administrator) to OIDC, open Settings > Users, and for each user to be migrated:
- Unlink them from their existing authentication provider, if one is shown, using the link beside Save Changes
- change the Username field to their verified email address.
- Save the user account.
Updated 5 months ago
