Azure Active Directory Authentication
Instructions for setting up Azure Active Directory authentication with Seq
Seq can authenticate users in Microsoft Azure Active Directory. This makes it easier for organizations to centrally manage user accounts.
When this configuration is enabled, users will be redirected to an external Azure Active Directory sign-in page to authenticate when logging into Seq.
Setting up
Seq requires three pieces of information in order to use AAD as an authentication mechanism:
- Tenant Id - this is the unique identifier of the Azure Active Directory instance
- Client Id - this identifier will be assigned when Seq is set up as an application in the directory instance (the new Azure portal calls this Application Id)
- Client Key - this is the secret key Seq will use when communicating with AAD
The following steps describe how to set up Seq to authenticate users in AAD.
1. Determine the AAD Tenant Id
To find your Tenant Id, open the Azure Portal.
- In the left navigation bar, find Azure Active Directory
- Choose App registrations from the next left-hand menu
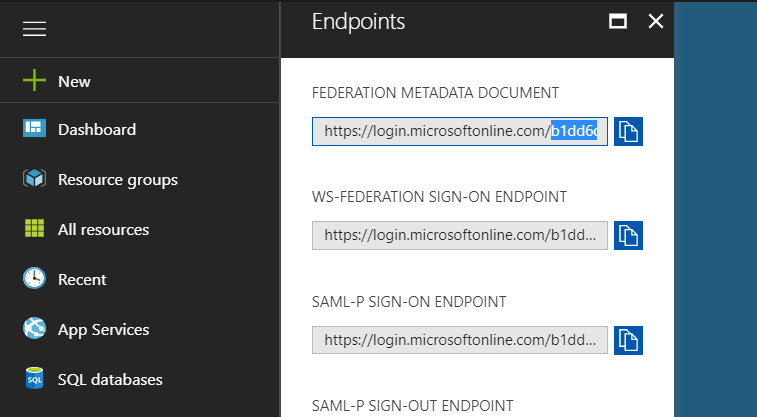
- At the top of the screen, select the Endpoints button
This will show a "blade" like the one below.

The Tenant Id is a GUID style identifier that appears in each of the URLs listed. Copy this value and keep it for Step 4.
2. Register Seq with AAD
Still on the App registrations page, select New application registration in the toolbar.
The app should be called Seq, registered as a Web app/API. The Sign-on URL is the base URL of your Seq server, i.e., where you access the Seq UI:
3. Configure the App
Once you have created the app, it will appear in the App registrations list. Click on it to reveal more details:

- Copy the Application ID value: this is the Client Id required in step 4.
- Click on Reply URLs and append
/aadto the path - Click on Keys and create a new key as shown below:

- Copy the keyValue - this is the Client Key required in step 4.
You should now have the Tenant Id, Client Id and Client Key values needed when configuring Seq.
4. Turn on Azure AD Authentication in Seq
Before starting this step, ensure your Seq server has access to the Internet.
If you are enabling authentication for the first time, you can do this after entering a trial or purchased license key and going to Settings > Users in Seq.
If you have an existing Seq instance with authentication already enabled and want to switch to Azure Active Directory, go to Settings > System and next to Authentication provider select Change.
Preserving Existing User Accounts
If you have existing user accounts that you want to link and continue using with AAD, please contact Support for migration assistance.
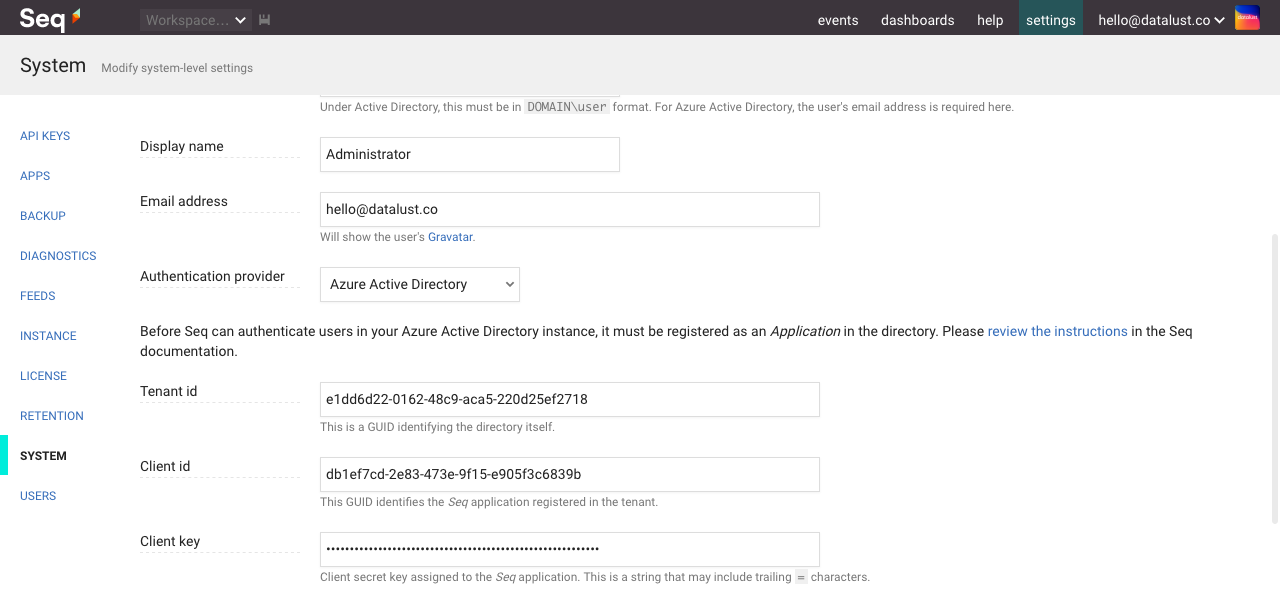
At the Change Authentication screen, choose Azure Active Directory from the Authentication Provider drop-down.

You will now see edit boxes for Tenant Id, Client Id, and Client Key collected in the previous phases.
The Username entered here must exist in the AAD tenant. This will become the admin user after the authentication provider has been changed.
After selecting Enable, Seq will switch to AAD authentication mode and present you with the Login screen where you must authenticate using AAD.
If you lose access...
AAD configuration can sometimes be tricky. If you made a mistake in the final step, you can reset Seq to use Basic authentication from the command-line on the Seq server.
seq.exe stop
seq.exe auth --basic -u "yourusername" -p "yourpassword"
seq.exe start
You must specify the
--storage=argument toseq.exe authif a custom storage location is in use.If you continue to have trouble, we're here to help - please contact us for support.
5. Add Users
Seq won't automatically provision accounts for users in your directory. To do this, please go to Settings > Users and add users as required.
When adding users to Seq, the Username for the user is the email address that's used when logging in to AAD.
Updated 5 months ago
