Signals
Easily save and apply complex filters.
Structured logs are designed for easy filtering and correlation. If you monitor apps in multiple environments for example, you'll pretty quickly turn to structured properties like Environment as a way to distinguish between logs from different locations:
Log.Logger = new LoggerConfiguration()
  .Enrich.WithProperty("Environment", "Production")
  // Other configuration, then...
  .CreateLogger();
When you collect and view these logs with Seq, you might end up writing the filter Environment = 'Production' a lot.
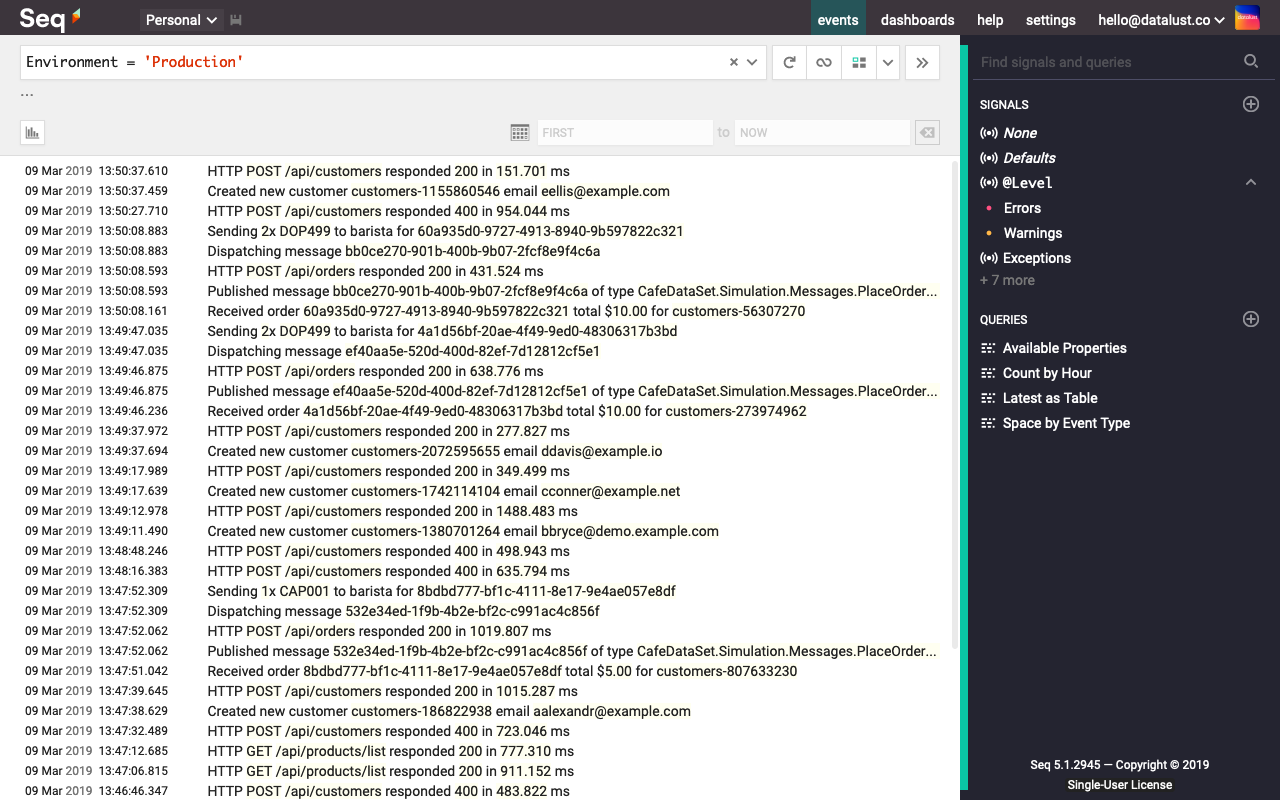
Instead of typing this a hundred and twenty times a day, Seq lets you save your filter as a signal. Press the "move to signal" (») button in the filter bar, and one will be created for you:
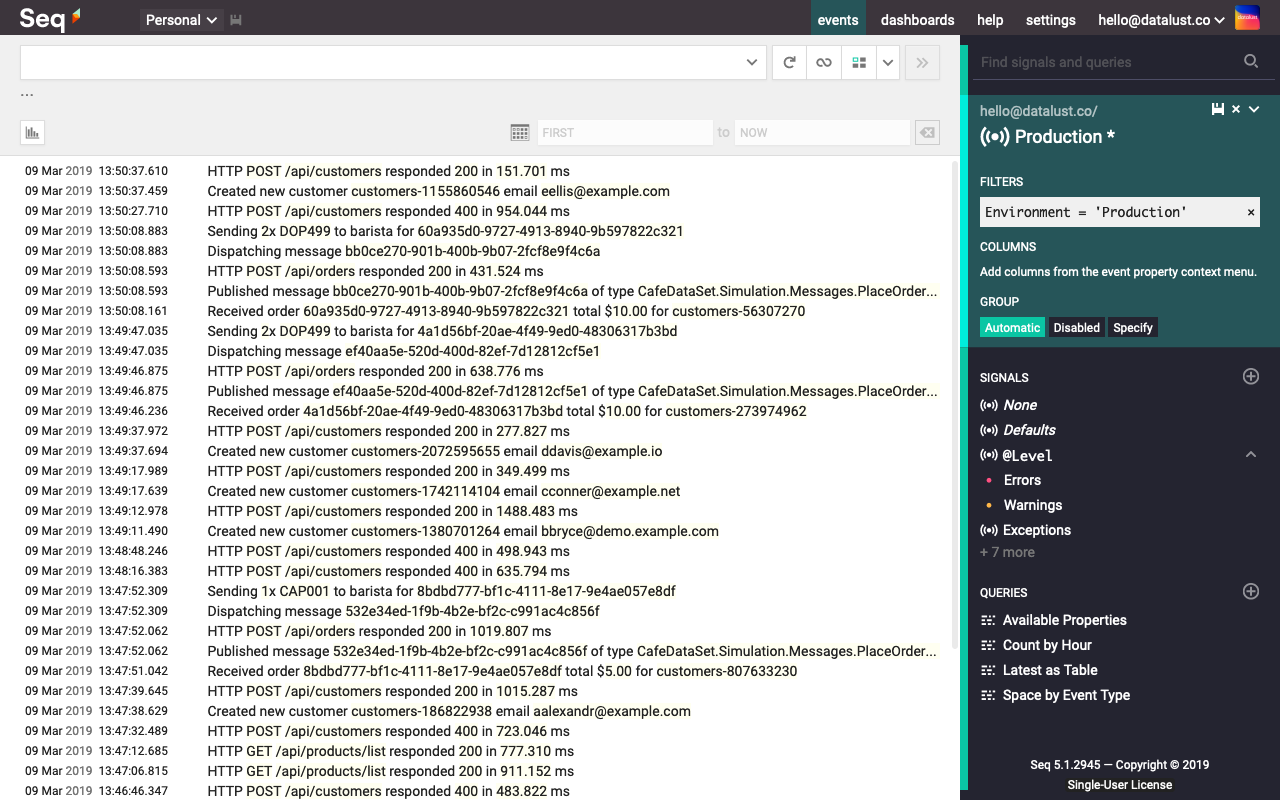
You can build up more complex filters by adding them to the signal with ».
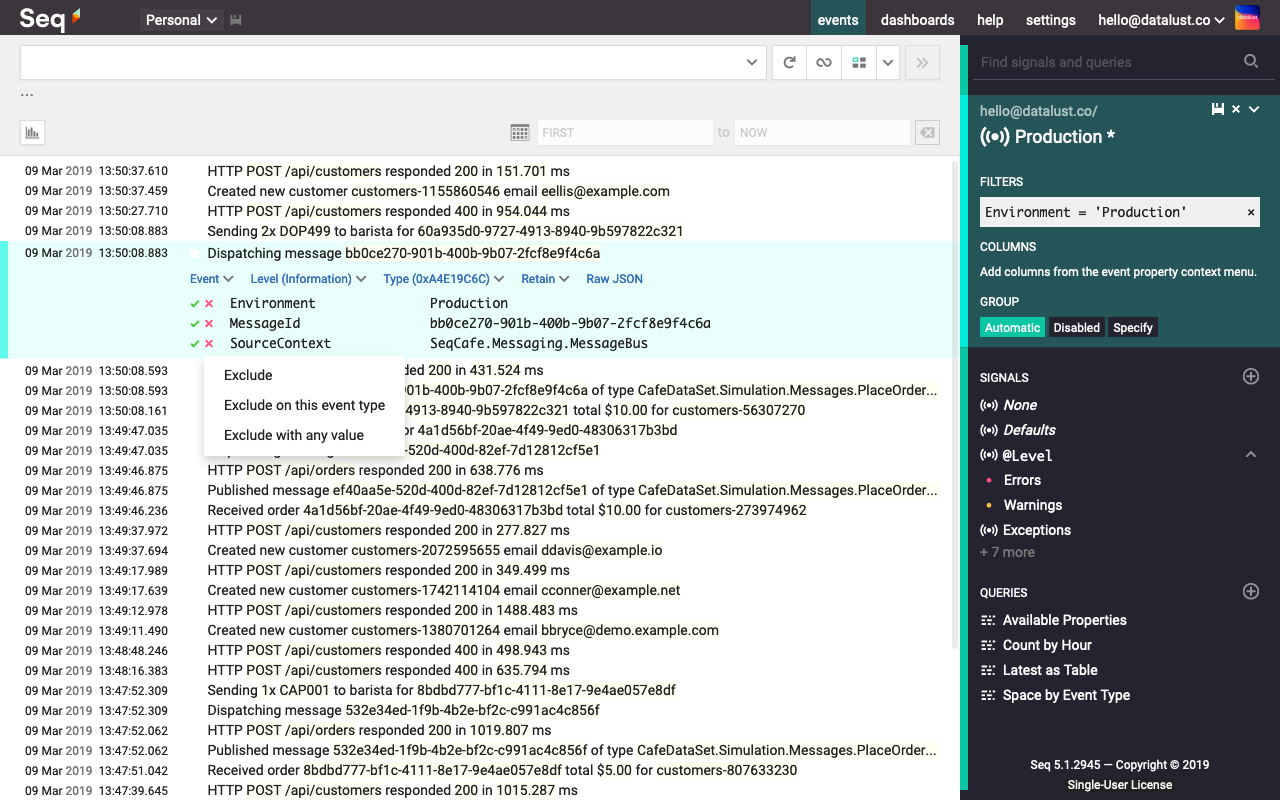
The various "exclude" options on event properties and types makes it quick to eliminate noise:
Once you've given the signal a name, saved, and closed it, you'll see it in the signal list ready to activate with a single click:
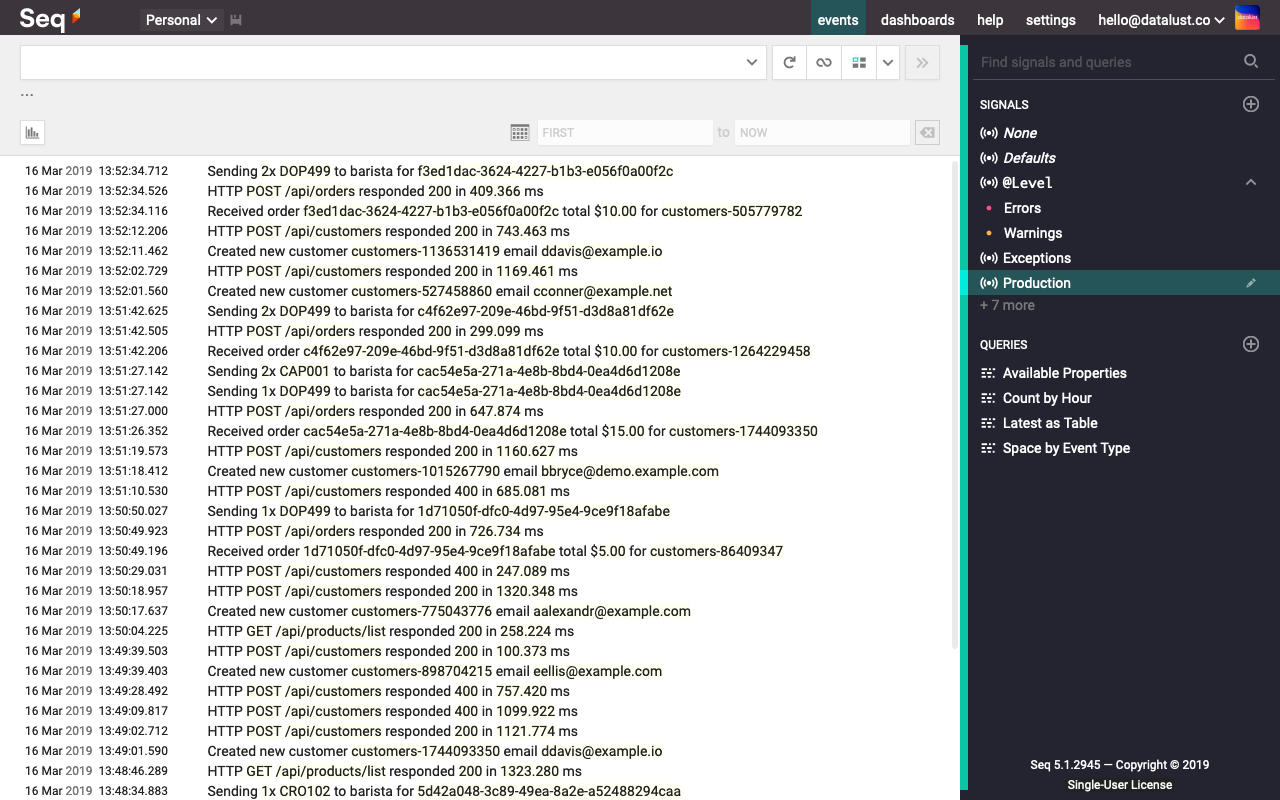
(Here's where signals start to shine - to apply multiple signals like "Production" and "Errors", just click to apply each one, and only events matching all of the applied signals will be displayed.)
Sharing Signals
Signals are "personal" by default; to share a signal with others on your team, click the drop-down menu in the signal editor, to the right of the signal name, and select "shared".
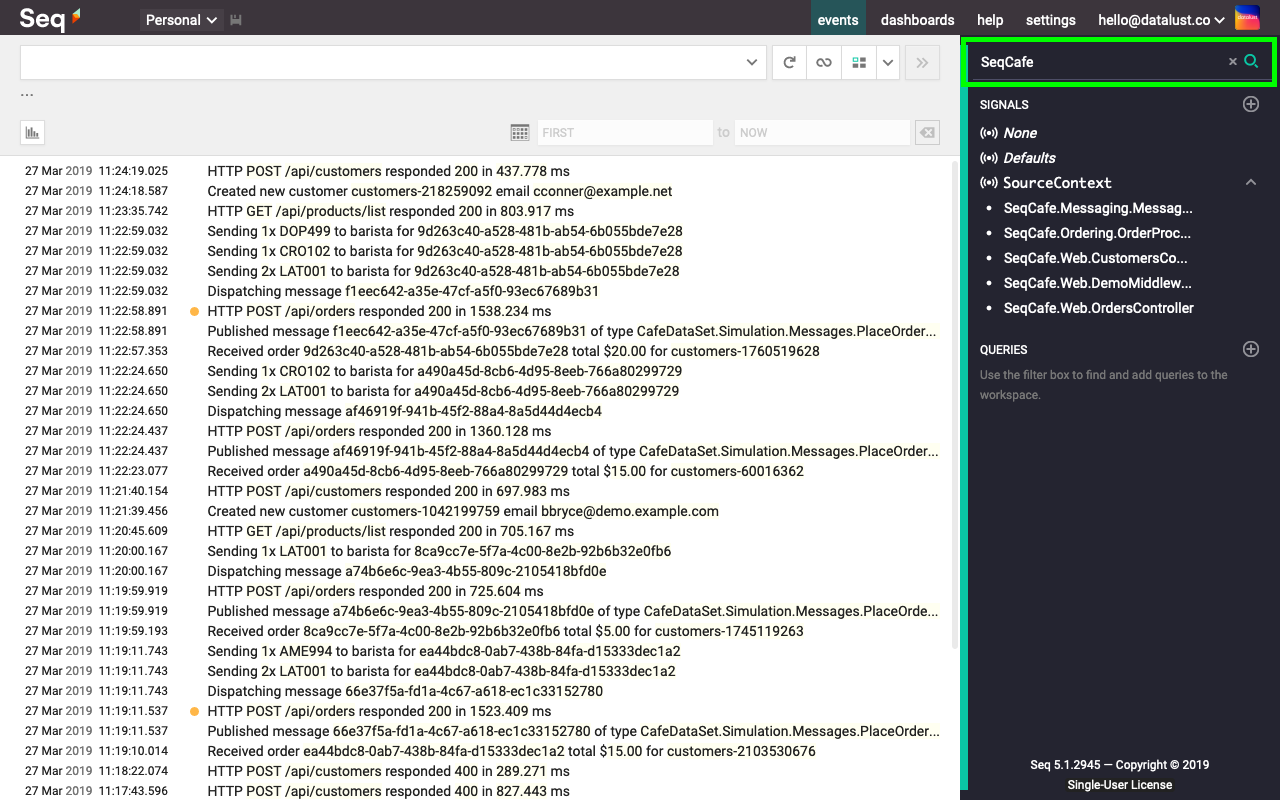
Signals are really fundamental to Seq, so busy teams quickly create a lot. Your default personal workspace won't show shared signals created by others: to see the list of signals everyone has created, and add them to your own workspace, use the signal bar search box:
Signal Groups
When you create signals, you might find yourself filtering on the same property multiple times:
Environment = 'Production'Environment = 'UAT'Environment = 'Test'Application = 'PointOfSale'Application = 'Distribution'
Seq will automatically collect signals with a single property filter into a signal group, like the @Level group in the screenshot:
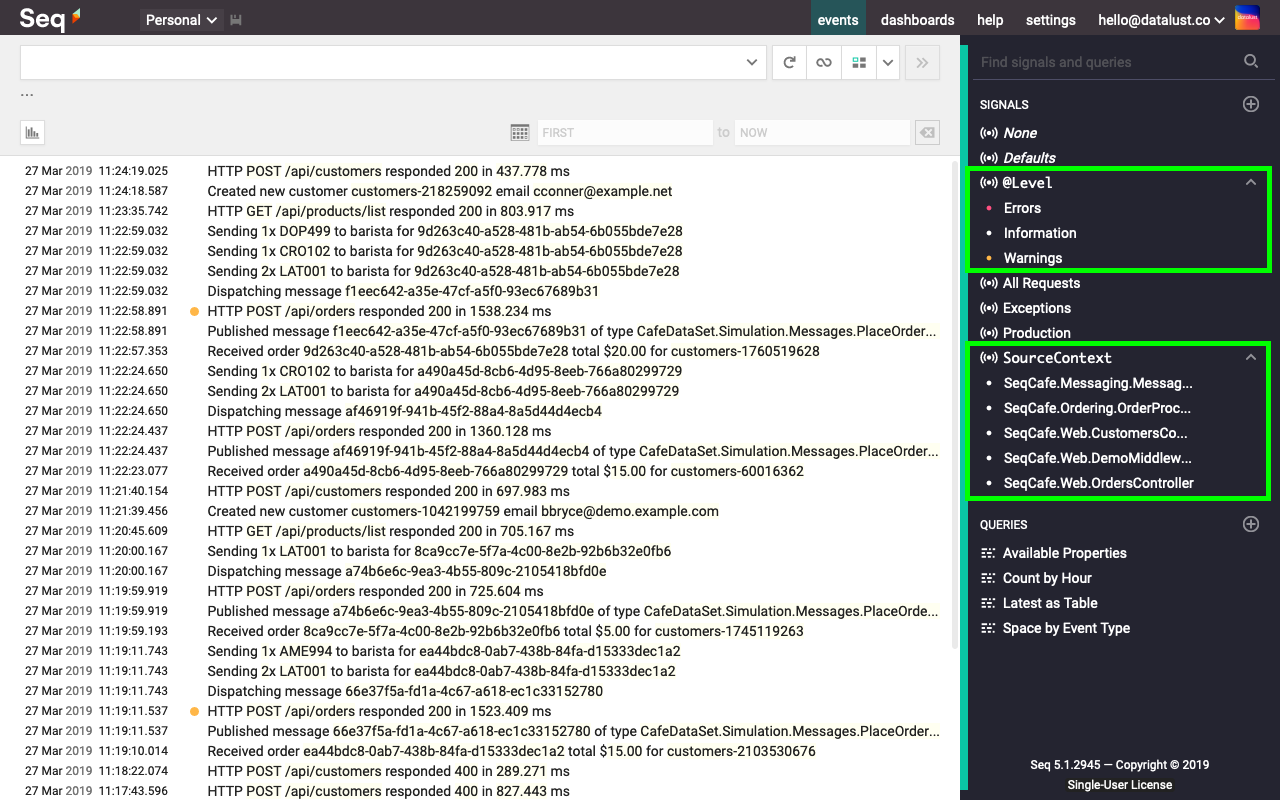
A signal group containing three signals.
Signal groups serve two purposes:
- Reclaim some UI space by allowing grouped signals to be collapsed.
- Union the filters of multiple selected signals in a group instead of intersecting them.
Let's dig into the second purpose more, by looking at how Seq converts selected signals into filters.
How signals are combined
When multiple signals from different groups are selected, like Environment = 'Production' and Application = 'PointOfSale', Seq will intersect them:
Environment = 'Production' and Application = 'PointOfSale'When multiple signals in the same signal group are selected, like Application = 'PointOfSale' and Application = 'Distribution', Seq will union them:
Application = 'PointOfSale' or Application = 'Distribution'For simple filters over the same property the union is more useful than the intersection, because the property will only have one value. An intersection isn't going to match any events.
Grouping Signals
Signals can be grouped automatically by inferring the right group from filters or they can be grouped explicitly. Signals can also be excluded from grouping.
Inferred Grouping
If a signal contains a single property equality filter then it'll be grouped based on that property name. The following signals will both be inferred as members of the Environment signal group:
Environment = 'Production'Environment = 'UAT'
Explicit Grouping
The logic for inferring group names is simplistic. You might want the following signals to all be grouped by @Level:
@Level = 'Error' or @Level like 'ERR'@Level = 'Warning' or @Level like 'WARN'@Level = 'Information' or @Level like 'INF'
Seq can't infer the right group for these signals automatically but they can still be manually grouped and unioned when selected.
Setting an explicit grouping
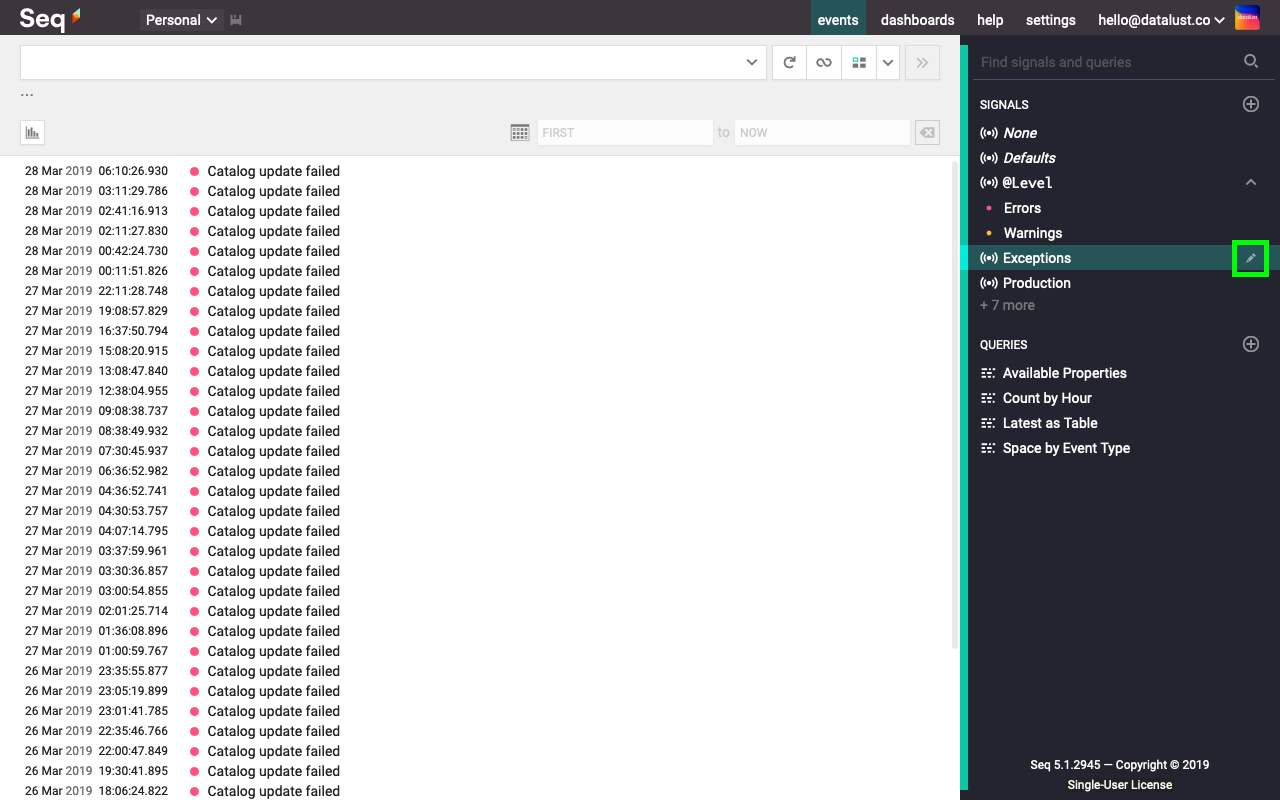
Select the signal you want to group and tap the pencil icon on the right of the signal:
In the signal editor, under Group, select Specify and enter the group name:
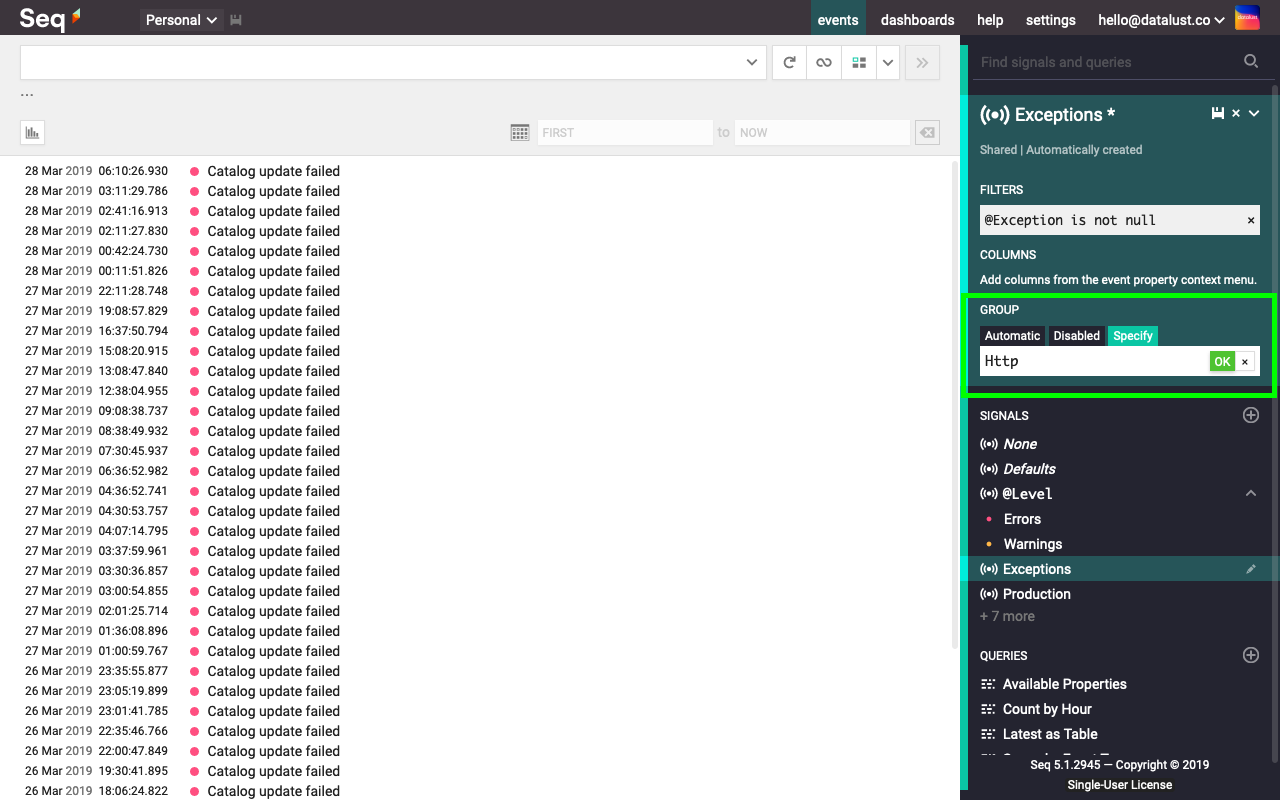
Save the changes to the signal. The signal will now appear under the specified group:
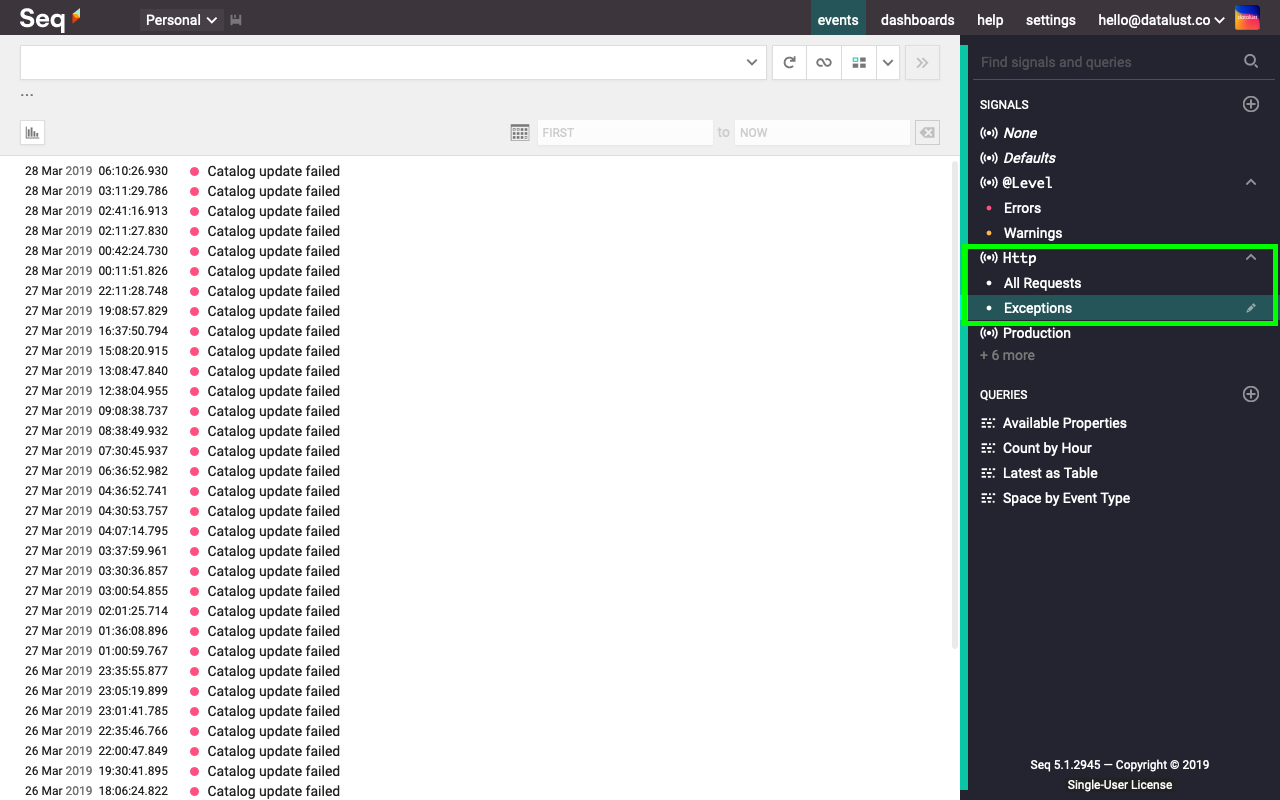
Group headings are only displayed when a group contains two or more signals.
Disable grouping
If you don't want a signal to be automatically grouped then you can disable inference for that signal.
- Select the signal you don't want grouped and tap the pencil icon on the right of the signal
- In the signal editor, under Group, select Disabled
- Save the changes to the signal.
The signal will now appear ungrouped.
Updated 5 months ago
